Many low sodium soy sauce substitutes use some combination of molasses, vinegar, and garlic as their base. I like this as a marinade but it has a sort of raw, unfinished flavor as a sauce. This low sodium alternative combines umami rich mushrooms, bonito flakes, and tomatoes to create a savory sauce that can be used as a sauce or marinade. You can even go a step further and ferment the vegetable mash before cooking it for an even deeper, richer flavor.
Let's be clear—it's pretty much impossible to recreate the taste of soy sauce without using any salt. If you're aiming to stay under 1500 mg of sodium per day, even low sodium soy sauce is probably off limits. You may be able to use some coconut aminos or Worcestershire sauce. But we're currently staying at under 150 mg sodium per meal and about 600 mg per day so most store-bought sauces are off limits. Our taste buds have adjusted, so what we're looking for here is a flavorful, umami packed sauce that we can use in place of soy sauce (and sometimes fish sauce) in our Asian-inspired meals.
This sauce is not meant to be a 1:1 replacement for typical store bought soy sauce, so you'll need to adjust accordingly. But with just 5 mg of sodium per tablespoon (compared to over 800 mg per tablespoon of typical soy sauce), you can get really creative and add it to any dish.

Servings: Makes about 2 cups
Sodium: Less than 5 mg per tablespoon Time: 90 minutes
Ingredients:
2 medium shallots, chopped (or 2 tablespoons minced, dried onion, or 1 tablespoon onion powder)
2 medium roma tomatoes, chopped
3 baby Bella mushrooms
1 pinch bonito flakes (optional, see picture below)
2 bulbs of garlic (not cloves), smashed
1/2 cup molasses
1 teaspoon whole black peppercorns
A 2-inch piece of ginger
1 1/2 cups water (or just enough to cover the vegetables as they cook/ferment)
1 1/2 tablespoons sugar OR one medium apple, diced (or both, depending on how sweet you like this)
1/4 cup whey extracted from yogurt (for fermenting only)
2 tablespoons sherry vinegar
2 tablespoons balsamic vinegar
4 cloves of garlic, pressed (this is in addition to the two bulbs, above)
1 tablespoon toasted sesame oil
To ferment the sauce:
I recently started fermenting without salt using whey extracted from plain yogurt after reading about it in this Spruce Eats article. It worked for my hot sauce and kimchi, so I decided to try it with this soy sauce substitute. As an aside, I also tried fermenting cucumbers with whey and they were awful. For me, going that extra step to ferment this sauce is worth it, especially if you're using it as a dipping sauce or dressing! It gives it a fuller, smoother flavor. It's a little more tangy, a little less sweet. I'll keep fidgeting with this recipe but for now, here's what worked for me. If you don't care to ferment, jump to step 4, below, to make the unfermented sauce.
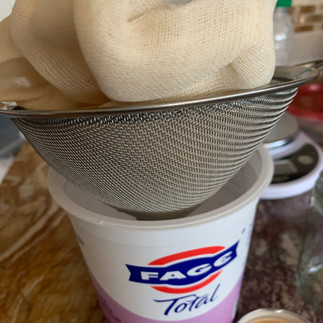
1) To extract whey from yogurt, strain some plain yogurt over a fine mesh sieve lined with cheesecloth and let it sit overnight. If you scoop out your yogurt so that you create a little bit of a well, the whey will pool up and that part will be easy to filter.
2) Chop the shallots, tomatoes, mushrooms, 2 bulbs of garlic, and ginger very small. If you're fermenting you need to use fresh ingredients, dried alternatives won't work. Place the chopped vegetables in a medium-sized bowl and add the bonito flakes (optional), molasses, black peppercorns, sugar, and whey to the chopped vegetables. This is all the ingredients except for the vinegars, 4 cloves of pressed garlic, and sesame oil. Transfer the mixture to a glass jar (2 pint-sized, or 1 quart-sized jar should work), then add enough water to cover the vegetables and fill the jar, and cover with a fermentation lid and set aside at room temperature (in a cool, dark spot) for about 1 week. In the pictures below, I tried half the sauce with 1/8 teaspoon of potassium chloride (aka salt alternative) to see if that would enhance the flavor or otherwise help but it didn't make any difference.
I'm new to fermenting so I'm in no position to advise generally on fermenting, but I can tell you what works for me. I use mason jars and these fermentation lids, and then put the jar in a dark corner of my dining room where I don't get much natural light. Then I cover the jar with a paper bag to keep it even darker. If you don't have fermentation lids, you can just use regular lids and "burp" the jar every day--just open the lid and let some air out. If you do this, you'll hear a little "pop" every time you open the jar once the fermentation gets going. The fermentation lids just allow that gas to escape without having to burp the jar. I learned a lot about fermenting from the website Insane In The Brine, there's a lot of information about materials and fermenting generally.
I tasted my sauce everyday, and after 1 week I was happy with the level of fermented-ness which is to say, it was bubbly and sharp and had that sort of tangy sourness. It's still quite sweet, too. There were two days when it got really hot here (over 90°F) and I opted to put the sauce in the refrigerator for a few hours in the late afternoon.
Here's a close up on day 2 when I started seeing bubbles.

3) Once the fermentation is complete, simmer and strain. I simmered it for about 40 minutes, but next time I make this I'm going to simmer for just 20 minutes to compare flavors. After simmering, proceed to step 6, below. Simmer, strain, and add the vinegars, raw garlic, and sesame oil. For the fermented sauce, I'm partial to just using balsamic vinegar rather than adding sherry vinegar at the end, but that's a matter of preference.
Here's a side by side of the sauces, the left is fermented, the right is not. In addition to differences in flavor, the fermented sauce is also little lighter in color and also separates so it needs to be shaken up every time you use it. I might try straining through multiple layers of cheesecloth next time to see how that changes the flavor.
To make the sauce without fermenting:
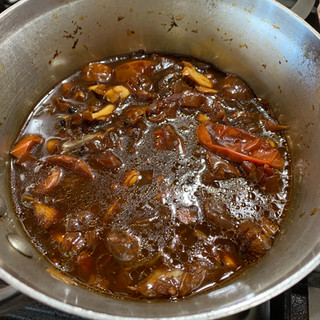
1) In a small sauce pan (mine is 1.5 quarts), combine all the ingredients except for the vinegars, 4 cloves of pressed garlic, and sesame oil. Bring the mixture to a boil and then cover and simmer on low heat for 1 hour, stirring occasionally.
One pinch of bonito flakes is just that, just pinch whatever you can between your thumb and index finger.
I've recently started making this sauce with an apple in place of the sugar. So far I've only used pink lady apples but I'm thinking fuji or gala would work too. You could also add sugar to taste even after using the apple.
For the garlic, I just roughly peel and then wash and smash each clove with the flat side of my knife to release their flavor. I’ve tried this with garlic powder in place of the fresh garlic and it just falls a bit flat, so wait until you have lots of fresh garlic to make this sauce. All these ingredients will be strained out later so they can be chopped coarsely.
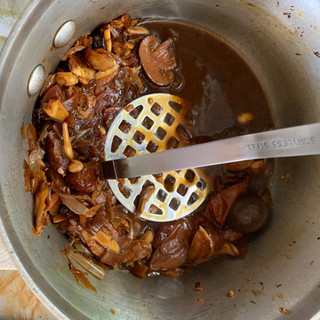
6) After simmering for 1 hour, use a potato masher to and mash up the mixture and get all the flavor into the sauce. Let the sauce cool for about 30-45 minutes then strain it.
After the sauce has been strained and cooled, add the sherry vinegar, balsamic vinegar, 4 cloves of pressed raw garlic, and sesame oil to the strained sauce. Don't substitute powdered garlic for this step.
The raw garlic added at the end will give the sauce a lot of flavor as it sits. You can strain it out after an hour or so, but I prefer to just leave it in and let it continue to infuse the sauce.
The sauce will keep up to a month in the refrigerator, and also freezes well.
This sauce has just 5 mg of sodium per tablespoon, so there's a lot of room here to add more sodium if your diet allows for it. You could use this sauce to dilute store bought soy sauce or coconut aminos.
Updated January 2021 to increase the molasses, add raw garlic, and allow the sauce to cool before adding the vinegars. Updated May 2021 to add fermenting instructions.


